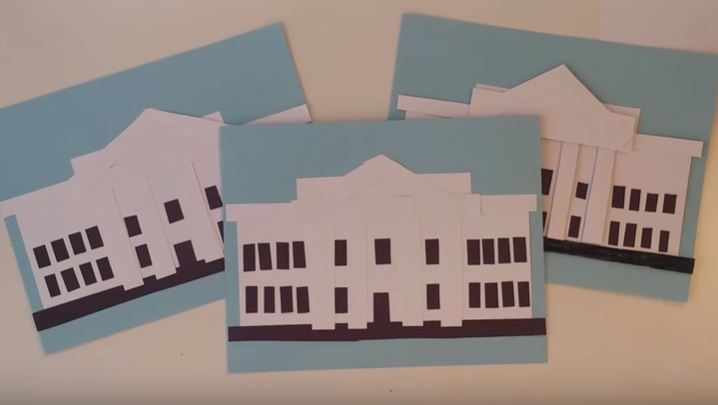
I’m excited to share with you how to make paper craft of the White House.
It’s a great craft for President’s Day or the Fourth of July or just about anytime you’re looking to do something with the kids.
So here’s what you’ll need.
3 pieces of paper (card stock or construction paper)
Scissors
Glue stick (or you can use tape)
So grab your things and follow along with me in the video. If it’s helpful, here are the major steps. But make sure to watch the video as it’ll be easier to follow.- The first step is to cut the black piece of paper all the way across into one long strip. This is the base of the house. I picked blue paper but you could use any color. I used card stock, which is a thicker. Same with the white, which we fold in half.
- Now we’re going to make the base of the house so just fold the paper in half a couple of times. And then we’re going to cut it. Once you have the bottom two pieces, you cut a little bit of the long piece, the long white rectangle just to make it a little straighter. This becomes the house.
- Glue the White House and the base, as well.
- The only other thing are some detailing on the house. Cut a little piece and use it as a door and glue it on.
- Now you can add some of the columns that give the White House is classical look. Cut one column and then use it to measure the other columns. I use four columns for the White House.
- When you glue them, just position them to look right. Nothing too fancy. Spread them apart evenly.
- Now we make the windows. Cut another long strip all the way across because we’ll need a total of 22 windows. Then cut the squares. I looked at a picture of the White House and there are actually 22 windows.
- With the windows glued, the last part is the top. Cut out more white strips and this going to go all the way across the top. You’ll make the roof with those strips. The dimensions don’t have to be exact.
- Glue it all down and there you have it!